- Camping Tips
- Hiking Tips
- RV Camping
- Destinations
- Blog
- Gear Reviews
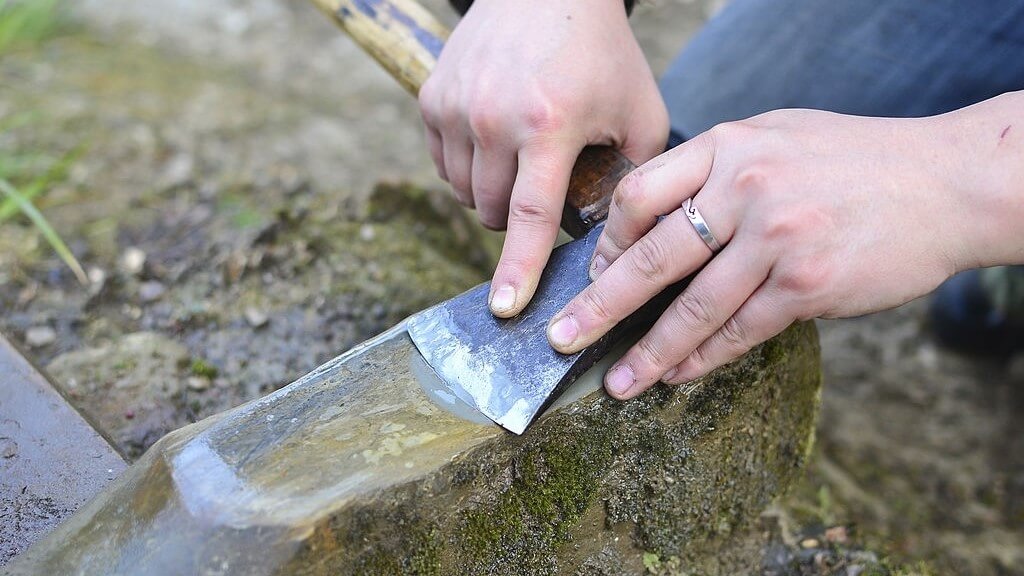
Whether you own a felling axe or a broad axe, you most likely know just how utilitarian and fun these centuries-old tools are for outdoor living. An axe is your best friend when you need to clear campsites, split logs, whittle a walking stick, or even produce kindling for your campfires.
A blunt axe or hatchet is the last thing you want while outdoors. A dull axe will have you using more strength than necessary; your strikes will be far less effective, and it is always an injury waiting to happen.
You must sharpen your camping axe or hatchet regularly for the best overall performance. As for the “when”: if the edge of the ax feels smooth to touch or looks rounded and humped then it is probably time to sharpen it.
Most axe heads are prone to rusting so regular sharpening and maintenance should help bring them back to tiptop shape.
There are many methods you can use to bring your axe’s edge to optimal sharpness including using age-old tools such as bastard files and sharpening stones, or specialized sharpening kits. True bush crafters might even go as far as to using quartz and rocks found in rivers to sharpen their axes and hatchets.

When working with power tools such as a grinder or belt sander, always wear protective gear and be sure to follow any relevant safety instructions. Always wear earmuffs, protective eyewear, a dust mask or a respirator, and thick gloves.
Additionally, any loose-fitting clothing, long hair, or jewelry should be avoided or at least well covered before operating power tools.
If you go the hand-filing route, then some gloves should be worthy of your consideration.
A file guard can be an extra precaution to take to avoid cutting your hands against the edge of the axe. It could be devised by cutting a 3- or 4-inch square of plywood, leather, or inner tube then slitting a small hole in the middle.
The square piece is then slid over the tang of the file and secured in place by the handle of the file.
Similarly, you will want to be very careful when running your fingers across the edge during the sharpness tests. Instead, maybe go for the much safer “paper cut” test?
Related: The Best Camping Axes and Hatchets, Thoroughly Reviewed
Whether you are using an axe sharpening kit or a bastard file, the sharpening process follows a few common steps. Keep in mind that some of the steps might be optional when you have limited tools or performing minor touches on your axe. The same processes are applicable when sharpening a double-bit axe.
Before sharpening your axe, first inspect it for any major issues then clean the axe head accordingly. Ensure the metal head is firmly and securely affixed to the haft to avoid any potential incidents.
Take note that if the axe is too dented, chipped, or cracked, then sharpening it is out of question. Additionally, severely damaged axes with mushroomed polls and an off-center eye might not be worth the hassle.
Next, you want to clean the axe head thoroughly to remove any dirt, oil, or rust. Cleaning it helps reveal any imperfections on the bevel or edge of the axe head making it far much easier to sharpen. Soap and water should be enough to do the trick.
Rust removal can be done using either rust remover chemicals or home remedies including the following:
Keep in mind that most of the above solutions only help loosen up the rust and thus you will still need to scour off the corrosion. Alternatively, you may forgo the chemical solutions and scour, scrape, and sand away the rust using sandpaper, steel wool, a scouring pad, or a steel sponge.
When inspecting your axe, take note of any nicks, chips, or dents to better determine if a coarse or a fine sharpening will be necessary. A visual inspection or running your finger along the bevel and edge of the axe should suffice in identifying any faultiness.
Next, secure the axe favorably to a bench vice using soft-grip jaw pads or bricks. The soft-grip jaw pads help prevent any indents in the ax handle. However, if you are working away from your home or workshop, then you may use a ground rig or fix the shaft between your legs.
To build the ground rig, you will need two to four wooden stakes and a log that’s about 10 inches in diameter. Drive in the wooden pegs in a row using a hammer or a stone and then place the log a few inches away from the pegs.
To conclude, place the axe head on the ground between the log and wooden pegs with the edge facing upwards at an angle suitable for sharpening.
When sharpening your axe, you want to shape the cutting edge and the area behind it. If you only sharpen the cutting edge, then your axe will wear down faster and most likely lose its original profile.
Put simply, the ax head profile or shape helps determine its function and more so affects how deep or shallow the axe penetrates the wood. It is mainly represented by the transition from the cutting edge to the cheeks and the rest of the axe.
Some of the most common axe head profiles include convex profile, flat profile, and broadax (chisel-shaped) profile among others. The axe head profiles are usually complemented by reliefs, hollows, and bevels to help prevent the axe from getting stuck into the wood.
With all that in mind, you want to reestablish the original axe head profile without forgetting any reliefs, hollows, or bevels that were present before. This will not only bring back the ax to its former glory but also help retain its functionality and longevity.
You may use a coarse or fine sharpening approach depending on the condition of the axe. We found bastard files to remove stock more controllably and quickly than, say, angle grinders.
A Sharpie or a felt pen should come in handy for marking where and where not to remove stock. Similarly, continually measuring the edge with a sharpening gauge helps ensure the bit remains symmetrical.
File or grind away the necessary stock needed to bring back the original ax profile while continually checking the progression and removing any loose metal shavings. Additionally, if the cutting edge has any nicks or dents, you may want to first flatten it before reshaping and sharpening it.
The axe head grind may also be customized at this stage to allow for more chunky bites further down the road. You may retain the original grind or fashion the cutting edge into other styles such as the chisel grind, banana grind, Scandinavian grind (V-grind), or asymmetrical grind, etc.
If you notice any burrs forming on the cutting edge, then it is probably time to move onto the next step.
While using your favorite honing tool, evenly sharpen both sides of the edge until there are very minimal burrs. Applying the same number of strokes on either side can be a good method to ensure even honing on the edge.
You may start with the coarse surface of your sharpening tool then switch to the fine surface to finish.
A leather strop with a chromium oxide finishing coat helps make cutting edge keener and free from burrs. A few strokes with the strop should leave you with a razor-sharp axe. However, always ensure that the stropping motion moves away from the cutting edge.
Lastly, a sharpness test can be carried out to determine if the ax is sharp enough. It can be done by visually inspecting the cutting edge for any nicks or pits, or by observing whether the edge reflects light or not.
If the edge reflects light, then it is probably not sharp enough and you might have to hone it a bit more. Other tests include passing the ax bit through a piece of paper or dry shaving the hair off your arm. We vouch for the paper cut test as it is much safer and more accurate than the other options.
Polishing the axe head after sharpening helps protect the blade, deter rust, and generally makes the ax last longer. With a smoother axe head, you won’t have to use too much force as the ax penetrates the wood and releases much more easily.
Like sharpening an ax, you may polish it manually or by using power tools.
If you prefer to do it manually, then you will need sandpaper of varying grits (coarse to very fine) and lubricant. Sand down all the sides of the axe head using coarse-grit sandpaper while lubricating each surface with WD-40.
Slowly transition to finer-grit sandpaper and sand 90 degrees to the previous grit until you achieve the desired finish. A mirror finish can be achieved by continually sanding the axe head with increasingly finer-grit papers.
Finally, rub the surfaces with some metal polish cream using a rag until you get a mirror finish.
The most popular power tools used for polishing edged tools include using a flap wheel attached to an electric drill or angle grinder and using felt pads attached to a Dremel rotary tool. If you go with the first option, you will still need a buffing wheel and suitable rubbing compounds to achieve a shiny mirror finish.
Using a Dremel rotary tool will be more tedious and will even require using suitable rubbing compounds for the felt pads.
Whether you polished the axe head manually or by using power tools, you want to cap things off by applying some oil and beeswax to the ax. The combo helps form a sticky coating that protects the metal axe from rusting.
While these approaches may require more elbow grease, they are an inevitable reality for most nature lovers and camping enthusiasts. Storage space and weight limitations when camping will most likely force you to stick to these rudimentary tools and sharpening methods.
Moreover, tools such as sharpening pucks, bastard files, Japanese water stones, and whetstones might be used in conjunction with power tools to achieve a sharp axe bit.
An 8 or 10 inches long bastard file should suffice for profiling the axe bevel and sharpening the edge. Always keep in mind that a file only cuts in one direction and thus any back-and-forth motions are simply counterintuitive and might end up damaging the file.
Filing down an ax can be done via two main methods namely the push stroke and draw file stroke.
A push stroke entails sliding the file at a slight diagonal angle or straight ahead across the edge of the ax. You will want to apply some pressure on the heel and tip of the file with each stroke. Moreover, your body should remain still with only your arms pivoting about your shoulders.
If you rock your body with each stroke, then there is a high chance that you will form an unnecessary arc on the axe blade.
On the other hand, the draw stroke method involves lateral motions along the edge of the ax. Start by holding the bastard file at an angle such that the part near its heel can shave the ax edge. Additionally, hold the tip of the file with one hand against the poll of the axe to act as the fulcrum as you move the other end laterally.
With either method of filing, make sure to perform equal strokes on both sides to maintain the blade at the center. A file card or wire brush will come in handy for removing any debris or file shavings out of the file teeth.
Aside from the sharpening stone, some oil or water will be needed for lubrication. Lubrication helps prolong the lifespan of the stone, reduces friction between your ax and stone, and results in a keener edge.
Some popular sharpening stones include natural whetstones, carborundum or corundum bonded abrasive stones, Japanese Waterstones, and diamond plates or stones. Given that you get a whetstone with a coarse and a fine grit side, then either of the types will do.
With the stone on a flat surface, apply some lubricant on its coarse side then place the ax blade at an angle on the stone. The angle should preferably match that of the bevel of the ax. Next, pull the blade back across the sharpening stone.
Perform equal strokes on either side of the blade then repeat the process using the fine-grit surface until you achieve desired sharpness.
If your whetstone is small enough, then you can hold it in your hand and sharpen your ax as you would with a sharpening puck.
Sharpening pucks are dual grit and often smaller in size as compared to whetstones. They are perhaps the most portable sharpening tools you can get for field sharpening. Like whetstones, a sharpening puck will require lubricant for quicker and easier honing.
Hold your axe securely in your arm such that the haft faces towards your body instead of clamping it down. After applying some water or honing oil to the puck, place it against the blade at an angle matching the bevel.
Proceed to make small swirling motions in a clockwise direction along the entire edge. Flip the ax over and perform equal strokes on the other side of the edge. Repeat the process using the finer side of the stone while continually checking for the desired sharpness.
Sharpening kits are extensions of your conventional sharpening stones and pucks. They comprise two or three sharpening stones with varying grit ratings and a small rig to affix them to. The rig is designed to effectively sharpen different axe head profiles including convex and V-shaped ones.
In addition, most sharpening systems tend to be very versatile and can be used to sharpen most of your edged tools. The system further helps you maintain the proper sharpening angle in line with the angle of the edge bevel.
Keep in mind that not all axe sharpening systems are made alike. Therefore, how to sharpen the axe will be mostly dependent on how the given kit is rigged.
Nature has plenty of “tools” you can use to sharpen your ax if you ever lose or forget your sharpening tools. Rocks with varying grits could suffice for either coarse or fine sharpening while live wood might just work for the honing and stropping procedures.
Look out for relatively flat rocks, quartz, granite, and sandstones with varying grits for the results. A great place to begin your search is around riverbanks or in shallow streams. Alternatively, the base of a ceramic coffee mug or concrete makes for a good sharpening surface.
Use the rock as you would a sharpening puck or a whetstone depending on how easy you can hold it in your hand.
To recap, make swirly motions across the blade with the stone or pull the axe bit back across the sharpening surface. Remember to perform equal strokes for both sides of the blade and use a finer grit stone to remove any pitting on the edge.
Feel free to use water for lubrication or just dry sharpen your blade. Debarked live wood is a good candidate for stropping to take care of any burrs and make the cutting edge even keener.
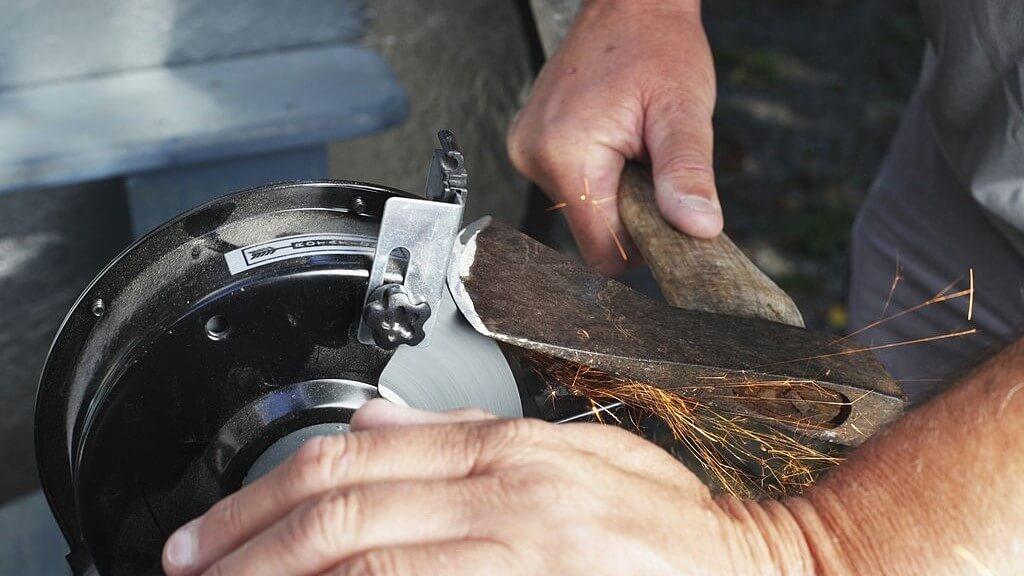
Safety is perhaps the biggest concern when using power tools to sharpen an axe. So, always wear protective gear and make sure to follow all the instructions that are relevant to a given machine. Moreover, you must have some familiarity with the tools before jumping into sharpening edged tools.
When using a bench grinder, you want the wheel moving away from the blade and never onto it. Apply light pressure as you grind away stock while regularly dunking the axe head into a tub of water. Frequently cooling down the head helps preserve its temper.
Then repeat the same process for the other side of the blade.
You may use a hand file and strop to finish off the edge and remove burrs since grinders tend to remove lots of material. Moreover, always go for light intermittent grinds instead of continuous ones to prevent heat buildup or hollowing.
Unlike bench grinders, belt sanders are easier to work with when sharpening edged tools. Whether it’s a vertical, a handheld, a bench, or a table model, you can easily swap the abrasive surfaces to allow for coarse and fine sharpening.
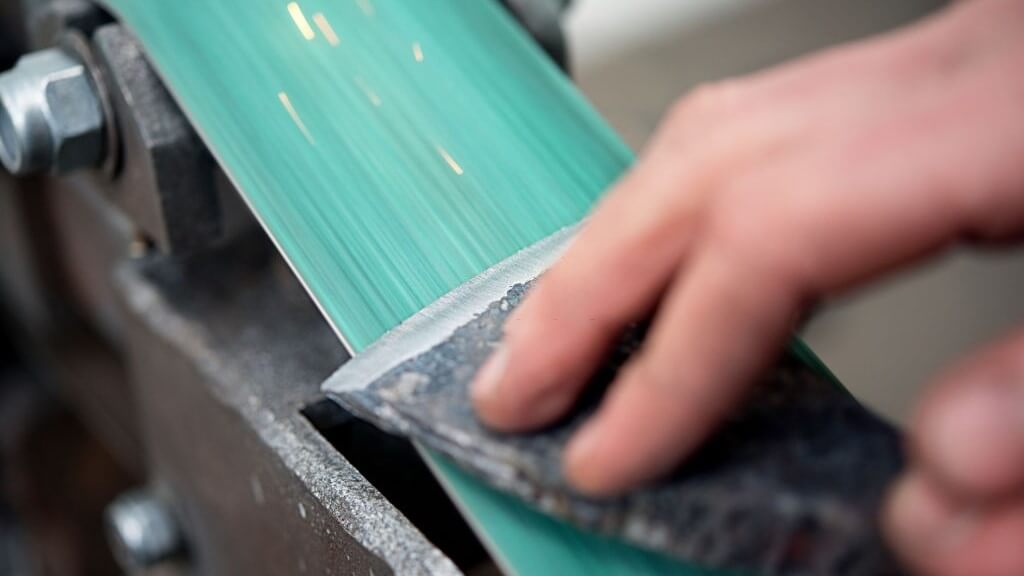
The type of belt to go for will depend on the angle and the bluntness of your blade. When sharpening the blade, push the cutting edge smoothly on the belt from laterally to achieve the desired sharpness. Moving it too fast on the belt will only result in heat buildup and you don’t want that.
Change the belt to a finer grit type to help rid of the wire edge and finish off the sharpening process.
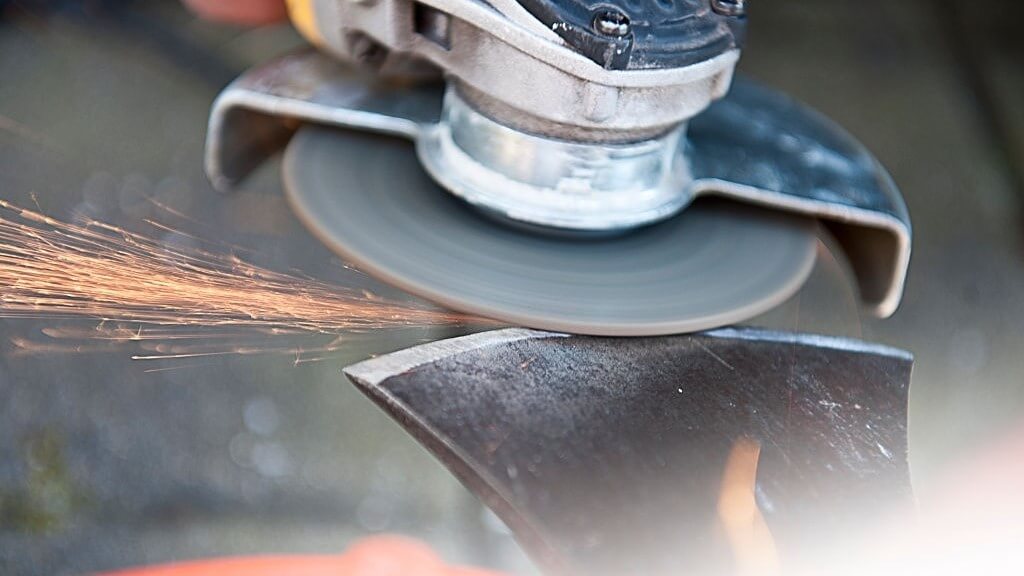
Finally, for the angle grinder enthusiasts, make sure to secure the axe with a bench vise or clamps before working on it. Here, you will still need to follow the angle of the ax bit to avoid messing with the functionality of the axe.
With the grinding blade installed, use smooth steady strokes when passing the grinder over the blade of the axe. Avoid making several passes in a row on one side to prevent decentering the cutting edge. Furthermore, always remember to continually cool down the blade after a few passes.
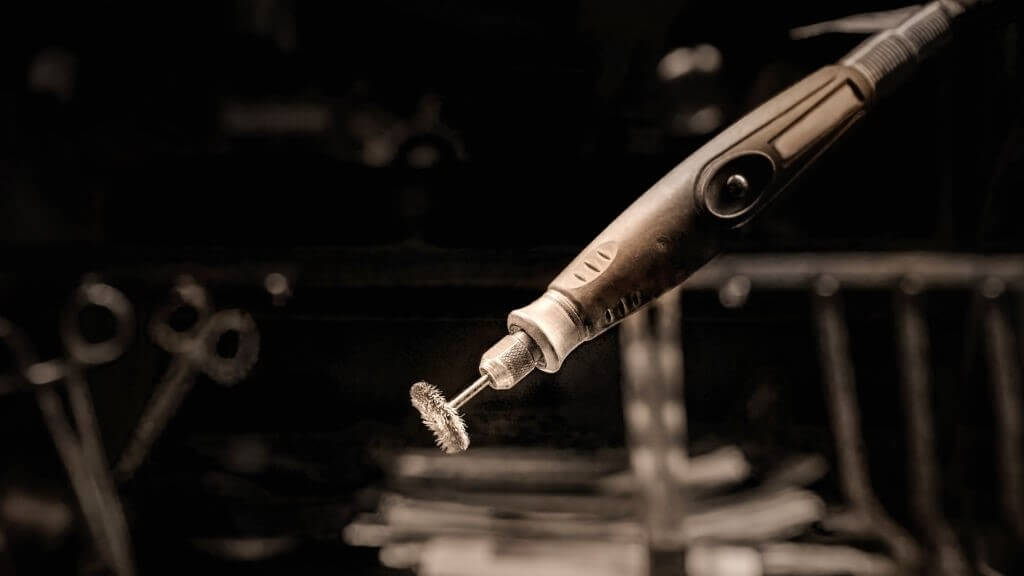
Dremel rotary tools are pretty much the hobbyists’ workhorses. They do it all! From polishing, carving, cleaning, cutting, sanding to sharpening, these tools rid your way of limitations.
When using a Dremel tool to sharpen your ax, you will need a grinding stone head, an angled tool sharpener accessory, a bucket of water, and protective gear.
Avoid curved grinding bits as they are meant for concave edges. Instead, stick to cylindrical grinding bits.
The tool sharpener accessory helps you keep the rotary tool along the angle of the edge, but you can always sharpen without it. Aluminum oxide grinding heads should be fine.
With that in mind, begin by grinding one side of the edge while applying light pressure, then do the same for the other side. You want to move the grinding stone as you would a hand file when cross-filing the edge of an ax. Incorporate the lateral motions with small swirling movements for an evenly sharpened edge.
Dunk the axe head in the bucket of water regularly to cool it down.
After you have achieved the desired angle and sharpness, you can use a wire brush or strop to remove any burrs on the edge. Lastly, perform either of the final touches we mentioned above, and you will be good to go.
Akin to your typical wheel grinder, an MDF Sharpening Wheel comprises a sharpening wheel cut from medium-density fiberboard (MDF), or plywood attached to a motor. You can make your own at home or buy one online or at your local hardware store.
Preferably, you want the tool to have a wheel on opposite sides for coarse and fine sharpening. Some buffing compound might be needed to make the surface of the wheels more abrasive. You may forgo the buffing compound and instead, attach a strip of sandpaper on the sharpening surface of the wheel.
To avoid hurting yourself, always sharpen near the top of the wheel with the abrasive surface moving away from you.
As compared to grinding wheels, there is little risk of heat buildup on the axe when using an MDF Sharpening Wheel but still be vigilant. That said, be sure to follow the angle of the bit and perform even and equal strokes for both sides.
An ill-maintained rusty axe takes a lot of effort and time to restore it to its former glory. So, you want to always take care of your edged tools and apply the best practices when sharpening them. The result will undoubtedly be an ultimately better experience outdoors.
When sharpening the ax with power tools, you want to always protect its original temper. If the axe head feels uncomfortably hot to touch, then leave it to cool or dunk it in water. Sometimes moving gradually from a coarse-grit to a fine-grit sharpening surface might help avoid heat buildup.
A sharp ax won’t scoop or glance off when struck into the wood. That said, remember that you only need to bring the ax back to shaving sharpness without drastically changing the original geometry of the ax. Avoid shaving off too much material as would weaken or thin out the edge.
Over-sharpening might easily cause the edge to break, chip, or become rolled over.
However, keep in mind that the sharpness of the edge mainly depends on the function of the ax. A splitting ax, for instance, will work best with a convex profile and a less pronounced edge. On the other hand, cutting and slicing axes typically have very sharp edges.
If you use the ax regularly, honing the edge daily with a whetstone or sharpening puck polishes the edge and removes burrs. When it comes to lubrication, oil is arguably messier to deal with and easily stains fabrics. So, maybe stick with water or just spit if you value easier clean-ups.
Ensure you use a chopping block to avoid chopping on rocks and dirt that might easily dull your ax. Keep the head covered when not in use with a nicely waxed leather mask or sheath to protect it from corroding.
Other no-brainer tips include:
In summation, don’t forget to properly dispose of the oily rags as they can be eventual fire hazards when they dry up.
Whether you got a classic splitting maul, hewing ax, or half-wedge ax, regularly sharpening your edged tools makes them safer and more effective to use. Since weight and storage space limitations are the bane of any camping trip, you will want to determine which tool sharpening routine works for you before setting out.
You may choose to thoroughly sharpen your ax at home using power tools or carry lightweight sharpening stones for on-the-go action. Either way, sharpening an ax goes a long way in improving its functionality, effectiveness, and longevity.
As Abraham Lincoln best put it, “Give me six hours to chop down a tree and I will spend the first four sharpening the axe.”
Charlie Leone
Website Owner/Editor
Welcome to CampingManiacs